Overview
The Dispatcher is your central command center for managing, scheduling, and assigning work orders to technicians. It provides a visual timeline view of all work orders, allowing you to drag-and-drop tasks, assign resources, and manage your service operations in real-time.The Dispatcher is designed for operational efficiency - schedule technicians, assign tasks, track progress, and ensure every work order is properly resourced and ready for execution.
When to Use the Dispatcher
Use the Dispatcher when:- Scheduling technician assignments for upcoming work orders
- Managing daily work order priorities and timelines
- Assigning resources (technicians, vehicles, tools) to tasks
- Tracking work order status and progress throughout the day
- Reorganizing schedules when priorities change
- Viewing all work orders across your organization in one place
Dispatcher Interface
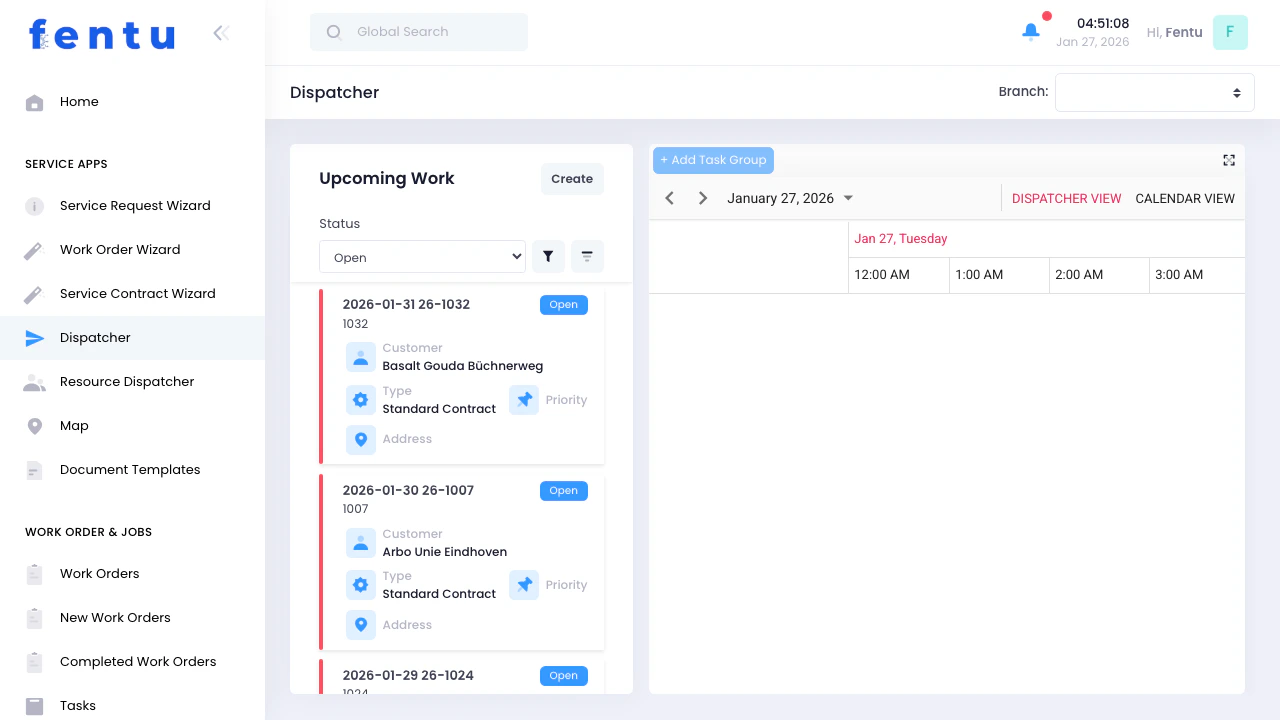
- Upcoming Work (Left)
- Timeline View (Right)
- Control Bar (Top)
Timeline Views
Dispatcher View (Timeline Day)
- 24-hour timeline from 12:00 AM to 11:00 PM
- Task groups displayed as rows
- Work order tasks shown as blocks in time slots
- Drag-and-drop scheduling
- Color-coded by work order type
Calendar View (Day View)
- Traditional day calendar layout
- High-level scheduling overview
- Simplified planning view
Adding Tasks
Task structure execution within a work order.Scheduling Tasks
Tasks define execution within the timeline. Each task can include:| Field | Description |
|---|---|
| Time Range | Start and end time |
| Resources | Assigned technicians |
| Vehicles | Service vehicles |
| Tools | Required tools |
| Products | Installation or delivery items |
| Service Objects | Equipment being serviced |
| Parts | Replacement components |
Service Object-Centric Execution
Each task is structured around one or more Service Objects. Each Service Object can include:- Checklist
- Time tracking
- Time & Material
- Parts consumption
Branch Selection
Filters all work orders by branch:- Controls visibility in Upcoming Work
- Controls scheduling scope in Timeline
- Ensures correct operational grouping
Workflow: Typical Dispatcher Day
- Review open work orders
- Prioritize urgent jobs
- Select work order
- Create task groups if needed
- Schedule tasks in timeline
- Assign technicians and resources
- Adjust schedule via drag-and-drop
- Monitor execution progress
Tips and Best Practices
Start with Open Status
Start with Open Status
Always begin your day by reviewing the “Open” status filter. These are work orders awaiting assignment and should be prioritized for scheduling.
Use Task Groups for Complex Jobs
Use Task Groups for Complex Jobs
For work orders with multiple phases or requiring different skill sets, create task groups. This makes it easier to assign specialized technicians and track progress through each phase.
Assign Specific Time Slots
Assign Specific Time Slots
Don’t leave tasks without scheduled times. Assigning specific time slots ensures technicians know exactly when to arrive and helps prevent double-booking.
Check Resource Availability
Check Resource Availability
Before assigning technicians, verify they don’t have overlapping tasks. The timeline view shows conflicts when task blocks overlap.
Color-Code Task Groups
Color-Code Task Groups
Use distinctive colors for different task groups. This makes it easy to visually identify work phases at a glance in the timeline.
Filter by Assignment Status
Filter by Assignment Status
Use “Unassigned” filter to quickly find work orders that still need technician assignments. This ensures nothing gets overlooked.
Use Full Screen for Busy Days
Use Full Screen for Busy Days
When managing many work orders simultaneously, expand to full screen mode for better visibility and easier drag-and-drop scheduling.
Assign Vehicles and Tools Early
Assign Vehicles and Tools Early
Add vehicles and tools to tasks during scheduling, not later. This ensures resources are reserved and available when technicians need them.
Common Questions
Why can't I add task groups?
Why can't I add task groups?
The ”+ Add Task Group” button is disabled until you select a work order from the Upcoming Work panel. Click on a work order first, then the button becomes active.
What's the difference between Dispatcher View and Calendar View?
What's the difference between Dispatcher View and Calendar View?
Dispatcher View (Timeline Day) shows task groups as horizontal rows with hourly time slots - best for detailed scheduling. Calendar View shows a traditional day calendar - better for high-level overview.
Can I assign multiple technicians to one task?
Can I assign multiple technicians to one task?
Yes! When creating or editing a task, use the Search button in the Resources section to select multiple technicians. This is common for complex installations requiring a team.
What happens when I drag a task to a different time?
What happens when I drag a task to a different time?
Dragging a task updates its scheduled time. Any assigned technicians receive notifications about the time change. Make sure to check for conflicts with other scheduled tasks.
How do I know if a task has all required resources?
How do I know if a task has all required resources?
Click on any task block in the timeline to view its details. The task editor shows all assigned resources, products, assets, and parts. If sections are empty, resources still need to be added.
Can I see work orders for multiple branches at once?
Can I see work orders for multiple branches at once?
No, the Branch filter shows work orders for one branch at a time. To manage multiple locations, switch between branches using the dropdown. This keeps the view focused and prevents confusion.
What does the 'My Task' filter show?
What does the 'My Task' filter show?
If you’re logged in as a technician (or have technician permissions), “My Task” shows only work orders where you’re assigned. This helps technicians focus on their own schedule.
How do I handle emergency work orders?
How do I handle emergency work orders?
Use the drag-and-drop feature to quickly reschedule existing tasks, making room for urgent work. You can also adjust task durations by resizing blocks to compress the schedule.
Related Documentation
Work Order Wizard
Create new work orders to schedule in the Dispatcher
Resource Dispatcher
Visual resource scheduling focused on technician calendars
Work Orders
Learn about work order management and lifecycle
Technicians
Manage your technician roster and assignments